Wednesday, June 15, 2011

SQL Server 2008 R2 Express Edition Installation (with screenshots)

SQL Server 2008 R2 Express Edition Installation (with screenshots)

Microsoft made some important new changes in SQL Server 2008 Express R2. One of the biggest changes is that the maximum database size has been bumped up from 4GB to 10GB. But SQL Server 2008 R2 express is still limited to 1GB of RAM and a single CPU.

The new SQL Server 2008 R2 Express product is packaged differently than previous versions of SQL Server Express. Instead of being labeled as a separate edition, each different SQL Server 2008 R2 Express package is now presented as an installation option. You can download the different SQL Server 2008 R2 Express editions at Microsoft’s website.  Below, I guide you through the new options of SQL Server 2008 R2 Express so you’ll have a better idea of what each offers.

1. SQL SERVER 2008 R2 EXPRESS DATABASE ONLY

Tipping the scales at 71MB for the x86 version and 74MB for the x64 version, Database Only is the smallest and simplest installation option for SQL Server 2008 R2 Express. This option is suitable for including in ISV packages and as a database for custom applications. This includes the core SQL Server 2008 R2 relational database engine but not the business intelligence (BI) subsystems like Analysis Services, Integration Services, or Reporting Services. This minimal installation option also doesn’t include any built-in management tools. However, most of the SQL Server core features are included such as support for the CLR and support for all data types, including the new geospatial and FILESTREAM data types.

2. SQL SERVER 2008 R2 EXPRESS MANAGEMENT TOOLS

It’s important to know that SQL Server 2008 R2 Express Management Tools doesn’t include the relational database engine. This installation option includes only SQL Server Management Studio Express (SSMSE). The Management Tools are 154MB for the x86 version and 163MB for the x64 version. (Doesn’t it seem somehow wrong that SSMSE by itself is almost twice the size of the relational database engine?) Anyway, you would use this option to manage previously installed instances of SQL Server Express.

3. SQL SERVER 2008 R2 EXPRESS DATABASE WITH MANAGEMENT TOOLS

This version, SQL Server 2008 R2 Express Database with Management Tools, is probably the best version for low cost database development for use with small business and departmental database needs. It has all the relational database features plus it also has SSMSE, which you can use for basic database management. This version weighs in at 235MB for the x86 version and 247MB for the x64 version.

4. SQL SERVER 2008 R2 EXPRESS DATABASE WITH ADVANCED SERVICES

The SQL Server 2008 R2 Express Database with Advanced Services option is the most full-featured SQL Server 2008 R2 Express edition. It comes in at a hefty 727MB for the x86 version and 795MB for the x64 version. This installation option includes the basic SQL Server relational database engine, as well as SSMSE, support for full-text search, and support for Reporting Services. This Express version of Reporting Services works only with the local SQL Server 2008 R2 Express instance. This also supports Database Mirroring (Witness Only) and Snapshot, Transactional & Merge Replication (Subscriber Only).

Step By Step Guide for SQL Server 2008 R2 Express Edition Installation

Below I show the steps to install SQL Server 2008 R2 Express.
1. Launch the package, you will then see the contents extracted to a temporary location.
clip_image002
2. SQL Server Setup checks to determine pre-reqs are installed. If not, you will be prompted to install.
clip_image004
3. The Installation Center will then launch. Click on “New installation or add feature to an existing installation” to start the Installation Wizard.
clip_image006
4. Accept the license terms.
clip_image008
5. Review the features to installed and where SQL Server will be installed. Make any changes that are necessary for your environment.
clip_image010
6. Review the Instance Name and change if necessary.
clip_image012
7. Review the credentials that will be used for the services that will be created.
clip_image014
8. Review the Authentication Mode and the administrators that will be added to the Database Engine.
clip_image016
9. Review the Error Reporting settings. We encourage you to keep this option checked, as we review the product feedback on an ongoing basic.  This helps us to continually improve SQL Server.
clip_image018
10. That’s it!
clip_image020
11. Check the SQL Server Express Version and Edition by executing the below TSQL query
SELECT
SERVERPROPERTY(‘ProductVersion’) AS ProductVersion,
SERVERPROPERTY(‘ProductLevel’) AS ProductLevel,
SERVERPROPERTY(‘Edition’) AS Edition
GO
clip_image001

New Features in Microsoft SQL Server 2008 R2

New Features in Microsoft SQL Server 2008 R2

Introduction

At TechED 2009, Microsoft has announced the launch of SQL Server 2008 R2 which was also known to the SQL Server Community by its code name Kilimanjaro. Microsoft will release SQL Server 2008 R2, first Community Technical Preview (CTP) during the second half of 2009. SQL Server 2008 R2 provides lot many new features and capabilities for Business Intelligence users which can be leveraged by many organizations around the world. To know more about how to install SQL Server 2008 R2, I would recommend you to read the article titled How to Install SQL Server 2008 R2 on a Windows Server 2008 R2.

Overview of New Features in Microsoft SQL Server 2008 R2

Microsoft SQL Server 2008 R2 introduces lot many new features for Business Intelligence users, Developers and Database Administrators. This article gives you an overview of some of the new features in SQL Server 2008 R2.

Capitalize on Hardware Innovation

There was always a demand from customers to increase the number of logical processors supported in SQL Server. In SQL Server 2008 R2 the number of logical processors supported has been increased from 64 to 256 and it will take advantage of the multi-core technology. This will help improve performance and scalability for very large data warehousing applications.

Optimize Hardware Resources

This is a great new feature for database administrators as it will provide a real time insight into Server Utilization, Policy Violations etc. This feature will help organizations to strictly apply organization wide policies across servers thereby helping them maintain a healthy system.

Manage Efficiently at Scale

This feature will help database administrator to gain insight into growing applications and databases thereby helping them to ensure better management of database servers.

Enhance Collaboration Across Development and IT

Database Application development will be more closely integrated with Visual Studio 2010 which will help to ensure higher quality during the application development along with easier deployments and better handling of changes over time.

Master Data Services (MDS)
A Master Data Service (MDS) is a kind of data service that is responsible for: managing, in a single place, the uniqueness, integrity, quality, and interrelationships between the data that matters the most. This will improve the quality of your data because of centralized approach of defining; deploying and managing master data thereby ensure reporting consistency across systems.

Build Robust Analytical Applications

Using Microsoft Office Excel 2010 you can build robust analytical applications which will allow in-memory, column oriented processing engine to allow users to interactively explore and perform complex calculations on millions of data at lightening speeds. Using Microsoft Excel 2010 you can easily integrate data from multiple sources such as corporate databases, spreadsheets and external data sources.

Share and Collaborate with Confidence

Using Microsoft Office SharePoint 2010 users can easily publish reports to SharePoint sites thereby making it available across the organizations. The other advantage is that the reports can be refreshed automatically and you can also maintain version controlling and tracking using SharePoint. Once you start using Microsoft Office SharePoint the SharePoint Administrators will have the ability to set server policies and monitor them more effectively thereby securing the business critical information.

Support for Geospatial Visualization

Microsoft SQL Server 2008 R2 will provide support for geospatial visualization including mapping, routing, and custom shapes. It will also support SQL Spatial and will also provide integration with Microsoft Virtual Earth tiles.


Mobile phone safety for kids....

Mobile phone safety for kids

Mobile phones range from the most basic, like those for younger children that can place calls only to restricted numbers, to smartphones that are essentially tiny computers which offer:
  • Internet access to social networks such as Facebook, as well as to games, videos and video chat sites, TV shows, music, and applications (apps).
  • Use of camera and video that are fun, but also provide opportunity for bullies and others, and enable taking and sharing suggestive photos or videos (known as sexting).
  • GPS tracking that makes it possible to pinpoint the location of the phone—and the child. You can use this to monitor where your kids are, but if it is not used carefully, so can others. Furthermore, smartphones may tag a photo (geotagging), revealing precisely where and when it was taken.
Pick a service plan with the functionality and mobile phone safety features that are right for each child. Add features such as text messaging, photo-sharing, or Internet access only when you feel your child is ready to take on each new responsibility. Also, note that if you choose a billed plan, versus a prepaid plan, you can better monitor monthly charges, such as "free" offers with hidden monthly charges.

Agree on what features kids can use

Based on the age and maturity of each child, agree on phone features. Define clear rules for sensible use and the consequences for breaking them. Talk about usage: who they can talk to or text and when, the websites they can visit, and so on. With older kids, discuss cyberbullying and sexting.
From time to time, ask your kids to show you what is on their phones. Periodically re-examine rules as children mature and mobile technologies evolve.

Teach kids safe and responsible phone use

Help kids understand the following:
  • Share their phone number only with family and close friends. Do not put it on social network pages, use it to enter contests, or give it to just anyone who asks for it.
  • Lock the phone with a PIN that your child keeps secret (even from best friends) to prevent others from snooping or misusing it.
  • Don't say, text, or post anything that would hurt or embarrass someone.
  • Don't make, send, or accept provocative texts, photos, or videos.
  • Avoid clicking links in ads, contests, text messages (even from friends) offering free prizes and the like.

Get help from technology

Clearly explain why you are using safety tools and what they will do for your children's information security. Consider setting them up together.
Some protections are provided through the carrier's service; others can be set on the mobile phone. The most reliable are those on the phone, because when a phone uses a wireless network, it bypasses the carrier and its tools.
Filter or block websites and content as appropriate for your child's age and maturity:
  • Consider blocking Internet access for the youngest; for teens, think about restricting access to gambling, adult, and other inappropriate sites.
  • Filter lyrics, video, and other content that is violent or explicit.
  • Restrict access to forums (including in games) unless they are moderated by humans.
Use GPS cautiously. If you use a family location service to monitor your kids' whereabouts, make sure others cannot locate them. Otherwise, consider disabling the location feature on your child's phone; at the very least, turn it off in the phone's camera.
Manage contacts, which can include blocking callers and restricting contact to approved numbers only.

What to do if there are problems

Immediately report:
  • Physical threats, persistent cyberbullying, or any form of exploitation to the police and the carrier.
  • Inappropriate content or behavior to the carrier or app.Mobile safety for kids

5 online safety tips for grads

5 online safety tips for grads

It’s graduation season, so whether you’re graduating or your child is, here are some safety tips for what’s ahead.
1.       Spot and avoid job-hunting scams.  Paper resumés are going the way of the dodo, so graduates (or anyone searching for a job) should be careful about how much personal information they put online and should learn how to avoid job hunting scams. For more information, see Online job-hunting scams.

2.       Protect your new computer. If you got a new computer for graduation, be sure it has reputable antivirus software to protect against malware. To learn what else you need to do before you go online with a new computer, see How to boost your malware defense and protect your PC.

3.       Secure your smartphone. A phone that lets you surf the Internet, download apps, and take and send pictures is a great gift for high school or college graduates. Learn how to help keep the information on your phone more secure.

4.       Manage your online reputation. More and more employers check Facebook pages and other online information before they hire applicants. Learn how to take charge of your online reputation.

5.       Use Microsoft Office more safely.  You probably already know that Microsoft Office includes useful tools for graduates. But did you know it can also help protect your computer from viruses and fraud? For more information, see Security in Microsoft Office 2010.

Why You Should Never Pay More Than $10 For HDMI Cables

Why You Should Never Pay More Than $10 For HDMI Cables

Why You Should Never Pay More Than  For HDMI Cables

You've probably guessed that gold-plated cables for your home theater are entirely unnecessary. Still, there must be some small quality difference for all that price, right? Mint.com's blog lays out the answer: No, not at all.
Teaming up with WallStats, Mint lays out the case against the gold-plated, gas-pressurized, terribly overpriced cables you'll find lining the shelves at electronics retailers. Monster is a main culprit of preying on those who haven't learned what Mint's very clever infographic illustrates: there is no difference that you can see with your eyes between a $6 HDMI cable and a $250 HDMI cable. Here's their full take:


The crying shame that is a $250 cable has been covered in-depth by our HDTV-obsessed cousins at Gizmodo, and the cable accessory money trail followed by Consumerist. If you've got a safe online or retail spot to order cheap cables, lead us to it in the comments.

Build a Silent, Standalone XBMC Media Center On the Cheap

Build a Silent, Standalone XBMC Media Center On the Cheap

You won't find a better media center than the open-source XBMC, but most people don't have the space or desire to plug a noisy PC into their TV. Instead, I converted a cheap nettop into a standalone XBMC set-top box. Here's how.
In the spirit of our Winter Upgrades theme this week, this guide details how to turn a cheapo nettop (think netbook for the desktop) into a killer settop box running XBMC. It handles virtually any video file I throw at it with ease (including streaming Blu-Ray rips from my desktop), it looks tiny next to my Xbox 360, it's low energy, and it's whisper quiet.

What You'll Need

Build a Silent, Standalone XBMC Media Center On the Cheap
  • Acer AspireRevo: This $200 nettop ships with 1GB of RAM, an Intel Atom 230 processor, 160GB hard drive, Windows XP (which we won't use anyway), and an integrated graphics chip that handles HD video and can output it to HDMI. It also comes with a small wired keyboard and mouse, but once you're done here, you shouldn't need either of them. Oh, and it's tiny. (Other, more powerful nettops will work [like this one's beefier, $330 older sibling], but this is the cheapest one I could find with the NVIDIA ION graphics powerful enough to handle the HD playback.)
  • XBMC Live: This is a Live CD version of XBMC that boots directly into XBMC and has a tiny footprint. Basically all you're running is XBMC, so your media center stays light and snappy. You can find the download specifically set up for these NVIDIA ION machines on this page, you can grab the direct download here, or download via BitTorrent here. UPDATE: The latest versions of XBMC Live should support the ION machines by default, so you should be able to go straight to the regular download page and use the XBMC Live download offered there.
  • A thumb drive: It doesn't have to be huge, but it'll need to be at least 1500MB of capacity, according to the installer. You should also format it to FAT32.
  • An IR receiver/Windows Media Center remote: This isn't strictly necessary, but if you want to control your shiny new XBMC via remote control, you'll need some sort of supported remote with a USB receiver. I bought this $20 remote because it was the cheapest I could find. (Incidentally, it also works like a charm with XBMC as soon as you plug it in.)
Getting XBMC Live up and running on your nettop is a breeze if you follow a few simple steps, so let's get started.

Install XBMC Live on Your Thumb Drive

XBMC Live allows you to try XBMC on any computer from a bootable CD or thumb drive, then optionally install the lightweight, XBMC-focused Linux distro directly to your device if you like. Since our nettop doesn't have a DVD drive, we'll need to first install XBMC to our thumb drive.
(There are ways around this. If you had a USB optical drive, you could probably burn XBMC Live to a disc and go from there. The thumb drive method isn't much more difficult, though.)
Here's how it works:

1. Download the XBMC Live installer by clicking on the Live link on this page.
UPDATE: If you've got access to a Windows or Linux machine, I'd recommend using UNetbootin to install the XBMC Live installer straight to your thumb drive. If you take that route, you can skip the next two steps. Just download UNetbootin, run it, set Ubuntu as your operating system and 10.x Live as your distribution. Assuming your thumb drive is plugged in and freshly formatted, choose your thumb drive as the drive you want to install to and let UNetbootin work its magic. When it's done, you'll have a thumb drive running XBMC Live and ready to install to your Aspire Revo.

2. Burn XBMC Live to a CD
Build a Silent, Standalone XBMC Media Center On the CheapOnce the download completes, unzip the xbmc.zip file. What you're left with is an xbmc.iso file—the disc image of the XBMC Live installer. Now you need to burn this ISO to a CD. Install our favorite tool for the job, ImgBurn, then right-click the xbmc.iso file and select Burn using ImgBurn. (If you're running Windows 7, you can use its built-in ISO burner, too, by selecting Burn disc image.)


3. Install XBMC Live to Your Thumb Drive
Now that you've burned XBMC to a CD, you're ready to install it to your thumb drive. To do so, plug in your thumb drive, put the XBMC Live CD in your DVD drive, and reboot your computer. If it's not already your default setting, go into your system BIOS (for most computers hitting Delete at the first boot screen will launch your BIOS) and set your optical drive as the primary boot device.
(All this means is that when your computer boots, it'll first check to see if there's any bootable media in your optical drive. If not, it'll continue booting to your secondary device—generally your hard drive. If your optical drive does contain bootable media—like your XBMC Live CD, for example—it'll boot it up.)
Build a Silent, Standalone XBMC Media Center On the Cheap

When XBMC Live loads, select "Install XBMCLive to disk (USB or HDD)", then accept the first prompt (by pressing any key). Next you'll end up at the "Choose disk to use" prompt, where you'll tell the installer that you want to install to your USB stick. Be careful here not to choose your hard drive, because it would be happy to overwrite your operating system if you told it to. Remember, your thumb drive is the Removable disk. After you pick the disk you want to use, confirm that you want to proceed and let the installer do its magic. (It'll only take a few minutes.)


Build a Silent, Standalone XBMC Media Center On the Cheap


Eventually the installer will ask you if you want to create a permanent system storage file, which presumably you'd want if you're not sure whether or not you want to install XBMC Live to your Acer's hard drive. I went ahead and created the system storage (even though we'll install XBMC Live directly to the hard drive in the next step.) Once the installation finishes, you're ready to proceed to the next step.

Set Your System BIOS

You'll need to make a couple of tweaks to your system BIOS to get it working smoothly with XBMC Live. So plug in your thumb drive, boot up your Acer AspireRevo, and hit Delete at the first boot screen to edit your BIOS. Look for the "Boot to RevoBoot" entry in the Advanced BIOS features menu and disable it. While you're there, set your XBMC Live thumb drive as the primary boot device. (You can set the primary boot device back to your hard drive later, after you've installed XBMC Live to your drive.)


Build a Silent, Standalone XBMC Media Center On the Cheap


Then go to the Advanced Chipset Features menu and set the iGPU Frame Buffer Detect to Manual and set the iGPU Frame Buffer Size to 256MB. (This is detailed here; the actual guide says 512, but that requires that you install more RAM—something I may do in the future, and will detail with a guide if I do. The 512 buffer size will help you stream the larger HD videos without hiccups.)


Build a Silent, Standalone XBMC Media Center On the Cheap
Now that your BIOS are set, you're ready to try out XBMC Live on your Acer AspireRevo.

Boot Up/Install XBMC Live to Your Hard Drive

At this point, you've got two choices. You can either restart your Acer AspireRevo and boot into XBMC Live to play around a little before you install it to your disk. If you're sure you're ready to install it for reals, just go ahead and run through the exact same installation as you did above, only this time install it to your nettop's hard drive. When you install to the hard drive, you'll also set a system password. This'll come in handy later.

The Final Tweaks

Okay, so far so good. XBMC should boot up directly from your hard drive now, and if you've plugged in your Windows Media Center remote, it should also be working without a hitch. You've just got to make a couple of adjustments to make it shine.
Now, what makes your little nettop work so well is that its onboard graphics processor can handle all the HD business without eating up your regular processor power, so you'll want to enable this in the XBMC settings. So head to Settings > Video > Play, find the Set Render to section, and set it to VDPAU.


Build a Silent, Standalone XBMC Media Center On the Cheap


Now, depending on how you're planning on hooking up your XBMC Live box to your television, you've got a few more tweaks you'll want to make. Namely this:
If you want to use HDMI for your audio out, head to Settings > System > Audio hardware, then set the audio output to Digital. Set your Audio output device to hdmi, and set the Passthrough output device to hdmi. Last, enable Downmix multichannel audio to stereo.


Build a Silent, Standalone XBMC Media Center On the Cheap


If you are using HDMI as your audio out (I am, and it's pretty nice), you've got to make one final tweak if you want the audio output to work with menu sounds. (It'll work fine with video without making this tweak, but the click-click sounds that play when you move around the XBMC menu are nice to have.) If that applies to you, create a new text file on your regular old computer (name it asoundrc.txt) and paste the following code (again, this awesome tweak comes from this post):
pcm.!default {
type plug
slave {
pcm "hdmi"
}
}
In the next step, I'll show you how to copy that file over to your nettop (a little trick that'll also come in handy for manually installing plug-ins and copying files to your nettop).


SFTP to Your XBMC Box

If you want to transfer files to your XBMC Live box from another computer, you'll need to get yourself an FTP client (I like FileZilla) and log into your nettop with the password you set when you were installing XBMC Live. To do so, create a new connection in Filezilla that looks something like the screenshot below (the default user is xbmc).


Build a Silent, Standalone XBMC Media Center On the Cheap


Once you're connected, make sure you're in the /home/xbmc/ directory, then copy over the asoundrc.txt file we made above. (The one you want to use if you're running your audio through the HDMI output.) Once it's copied over, rename the file to .asoundrc, restart XBMC, and the click-click menu sounds should be working along with regular old A/V playback.
The same SFTPing method here will be useful if you ever want to manually install any plug-ins or skins down the road, or just copy over media directly to your nettop's hard drive. (Though we'd recommend streaming—see below.)

Other Options

As I said above, you can buy more expensive, meatier machines, but for my money this Acer nettop has worked perfectly. Apart from upgrading to better equipment, you can also add up to 2GB more RAM if you're up for the job (RAM's so cheap these days, anyway). Like I said, though, so far I haven't seen the need for it.
I also quickly switched the skin to the MediaStream skin, which is the one you see in the photo at the top of the page. For a look at some other great skins you may want to apply to your XBMC box, check out these five beautiful skins—or just head to XBMC's main skins page.


Build a Silent, Standalone XBMC Media Center On the Cheap


Now that you've got it all set up, you've probably also realized that 160GB isn't all that much space for your media. You'd be right, of course. You've got two pretty good options. First, the nettop should have something like four free USB ports still, so you can easily plug in a big old drive that way. Assuming, however, that you can run an Ethernet wire over to your nettop, your best option is just to connect it to a shared folder on your home network. XBMC works like a charm with Samba shares (Windows shared folders use this).
Whichever method you use, you just need to add your extra hard drive space as a source in XBMC. You can do so through any of the individual menu items (videos, for example), or you can add a default Samba username and password in the settings so it can connect automatically without asking for a password each time you add a new watch folder on that machine.
At this point I could go into more detail on how to use and get the most out of XBMC (it can be a little hard to get your head around at first, even though once you do, it's not actually confusing). We've covered souping up your XBMC—and building your classic Xbox XBMC machine—and both offer some help in those directions. But stick around; tomorrow we'll follow up with an updated guide to some of our favorite XBMC tweaks.

A scratched DVD with Pledge

My Tip: Smooth A scratched DVD with Pledge

pledge.jpg
My DVD Player stopped short and said, "Error reading disc. It may be scratched or dirty." Rats! A thorough wiping and several more tries yielded the same result. On close inspection, the disc was indeed scratched.
This past MacGyver tip suggested using toothpaste to fix the disc, but I wasn't sure I had the right toothpaste (Mentadent.) Commenter cenoxo had said:
Spray a little Pledge furniture polish onto the scratched CD, then gently wipe it all off with a soft micropore cloth (the kind used for eyeglasses). Just like on furniture, the clear wax should fill in the scratches and make the CD playable.

Better Know an Office: Seattle/Kirkland

Better Know an Office: Seattle/Kirkland

In this month’s installment of Better Know an Office, our travels take us to the Seattle area—home of Nirvana, the Space Needle, and lots and lots of coffee. The area is also the home to a big contingent of over-caffeinated Googlers who work in not one, but two offices in the area. That’s right, the second edition of Better Know an Office is a two-for-one-deal as we learn about Google offices in both Seattle and Kirkland!  


Googlers hanging out on a dock near the Seattle office.
But don’t think these offices are clones of each other. Seattle is located right along the water next to one of the city’s most popular kayaking areas. The office keeps its own fleet of kayaks so Googlers can literally walk out the door and start paddling down the Ship Canal and head for Lake Union. For those who prefer to keep their feet on dry land, zip over to Kirkland and check out their rock climbing wall. Regardless of your hobby, if being outside is your thing, then the Emerald City area is pretty tough to beat. With more than 700 high-tech companies in the Seattle area alone, the city has become a hub for an extraordinarily strong and innovative tech industry. With all of this economic growth and energy, it’s no coincidence that Seattle has one of highest percentages of college graduates amongst major U.S. cities.


Rock climbing at the Kirkland office.

With so many fun things to do in these offices and the surrounding area, what exactly do Seattle/Kirkland Googlers work on?  “Asking what everyone does here is like asking what everyone at Google’s headquarters in Mountain View does,” says Scott Silver, Kirkland Site Director. “You can’t pinpoint just one thing.” Some of the better known projects here include Google Talk, Google Maps, Web Apps, and Chrome.  


We sat down with Scott Shawcroft, a Software Engineer on the Maps team, who works on developing the way Google Maps looks and interacts with 150 million users worldwide. One recent project the team tackled was creating the bike layer of Google Maps so that when a user wants biking directions, the map emphasizes biking-related attributes and gives lower priority to other information that drivers find useful.  Scott is just one of the many young engineers working in the Seattle/Kirkland offices who finds the atmosphere relaxing yet inspiring. “The Seattle area has a great technological undercurrent that isn't as obvious as the technology presence in the Bay Area.  It’s easy to meet others in the industry here, but it’s still easy to get away and relax”.


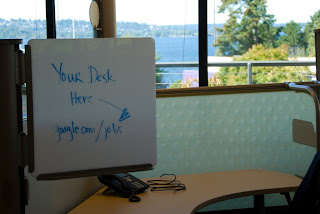
This could be you!

Sounds like a good place to be a Googler to us....and the way we hear it, Seattle/Kirkland has some great opportunities for students looking to be part of some big projects in these beautiful offices while living in one of North America’s coolest cities.  If that sounds like your cup of tea (or espresso), make sure to apply todaY..